Friday, April 28, 2023

Can't Have A Rainbow Without A Little Rain + Gnome Face Tutorial!

 Happy Friday everyone! I'm back today with my latest project for Jaded Blossom. I'm having a blast with the last release so I've created another scene card. My gnome is outside enjoying a cup of coffee, the warm sun, and beautiful rainbow!

I've been asked a lot in the Jaded Blossom Facebook Group how I create the face on the gnome so keep scrolling through this post for a short tutorial. :)


To create this card, I used the Gnome Dies with the Weather Add Ons (rain hat, sun, and cloud). The rainbow is from the Rainbow Dies. The grassy knoll was cut out using the grass border die from Mushroom Dies. I raised the sun, rainbow, and cloud on foam tape for extra dimension.


Now for the long awaited Gnome Face Tutorial. You're gonna be surprised at how easy it is. :)
 
Step 1: Cut your gnome body from white paper. Since I color with Copic Markers, I cut the gnome from Xpress It Blending Card. Now, all you do is color in the bottom portion of the "hat" in skin tone colors to create the face. I used E000, E00, E01, E11, and E13. You can use any skin tone coloring medium you have....colored pencils, markers, or crayons! If you don't want to mess with colorong, then just cut the gnome shape from cream or tan cardstock...easy peasy!

**NOTE: If you want him to have rosy cheeks you can use a cotton swab with pink chalk and add it to the lower sides of his face. If you want to add cheeks closer to his nose, then do this step now before you glue down his mustache.
 

Step 2: I cut the rest of the pieces I was going to use from Copic Xpress It Blending Card and once again used my Copic Markers to color in the pieces.
Do you see the hands by the nose piece? Those are going to be his ears!


Step 3: Adhere his beard, mustache, and nose using glue. Next grab a black pen because we are going to draw in his eyes.


Step 4: I just free-hand the eyes using the Copic Multiliner Pen and color little oval shapes. If you have stamps, you could also use those.


Step 5: Next, you are going to add the extra set of hands to the sides of his head for ears. I usually lay my hat over the top of his head to gauge where his ears should go.


Step 6: The last step is to add his hat and whatever he is holding (coffee mug in this case). I did something a little different with the rain hat this time around. I used my cutting knife and cut a slit along the perforated line so I could slide his head under the rain hat. I liked it better because I was able to line up the hat right above his eyes and his ears.

 
I hope this inspires you to try adding a face to your gnomes! Also, remember we have a current monthly challenge going on right now. The theme is
POLKA DOTS, and you have until May 6th to play along! Be sure to check out the Jaded Blossom Store for all your stamps and gift giving supplies. They have various Cutting Dies to make party favors along with Favor Bags and Boxes. 

Have a great weekend!
Rosie

Thursday, April 27, 2023

For My Mom

 Hello, friends! Cynthia here sharing a new project just in time for Mother's Day! I love flowers and the Tropical Flower Dies are perfect for this special occasion!


I die cut the little flowers in a light pink and edged each one with Distress Ink. I punched 3/8" circles for the centers and used some gold glittery gems for some added dimension. I die cut some greenery for accents from the die set. I used the barrel die for the foundation of the bouquet and added the wooden sign to highlight "MOM" from the Gnome Dies: Spring Add Ons. 


I die cut a white background and also die cut a farmer's market themed patterned paper for the base. I added a sentiment from the Mother's Day set and the card is done!

Thanks for stopping by!

Wednesday, April 26, 2023

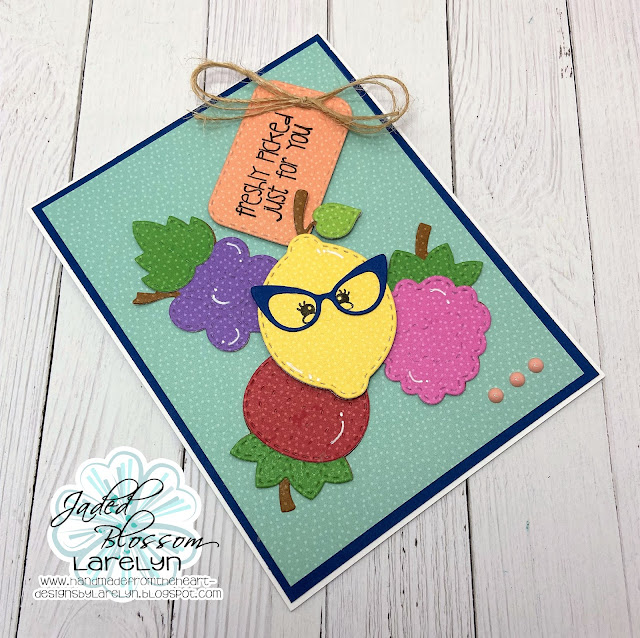
Fresh Picked Just for You

 Hi Crafty Friends,

It's Larelyn from Handmade From My Heart.
It's my design team sharing day.

I wanted to use some products that I've had for awhile.  It's fun to go through my Jaded Blossom bins and be reminded of all the wonderful products we've provided to our wonderful customers.

Here's today's make using some oldies but goodies :).


Here are the products I've used:
Berrylicious (retired)
Doodlebug Designs Rainbow Petite Prints 6x6 paper pad (be sure to sign up for Restock notice)

So glad you dropped by today,


Tuesday, April 25, 2023

Happy Spring


  Hi everyone...Lee-Ann here and it's my day to take over the Jaded Blossom blog. Today I have a fun Spring card to share. Thanks for stopping by...Lee-Ann :)

* If you'd like to make this one too...I have an instructional video on my YouTube Channel...here and Jaded Blossom's YouTube channel here.

*pan down to check out all the products that I used


Recipe:
  1. Jaded Blossom-Card mat dies, Stitched and Scalloped Oval dies, Border dies, Girl Gnome dies, Gnome dies Spring Add Ons, Gnome dies Easter Add Ons 2, Easter Wishes stamp set
  2. PTI card stock-lemon tart and white
  3. Sakura white gelly roll #10
  4. P13 stamping pad skin tones
  5. Doodlebug-Shape Sprinkles Snugs and Kisses, Hippity Hoppity 6" pad, Card stock-pink, Rainbow Petite Prints-Dot Stripe and Gingham Linen
  6. Versafine Clair Nocturne ink
  7. Echo Park-Celebrate Easter 6" pad and matching 12" solids-teal and green
  8. AC card stock-Brown

Monday, April 24, 2023

April Showers Mini Release

Happy Monday! We are super excited to introduce our April Showers collection!


We have four new items available! 

Gnome Dies Weather Add Ons $33.99

Diagonal Card Mat Die $19.99

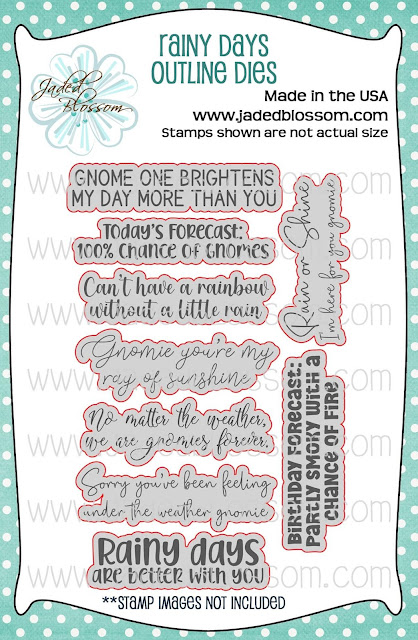
Rainy Days $15.99

Rainy Days Outline Dies $16.99


We also have a select few items on sale that go with our release. 

Make sure to check out all the design team projects by clicking on their names below.

Thursday, April 20, 2023

Carrot Stencil and card!!!


This is Cindy from Cindy's Scraptastic DesignsIt's my day to post over at Jaded Blossom.
For today I did a card and stencil samples

Here is a link to my YouTube video for my card!!!


I used Jaded Blossom the CARROT STENCIL for my samples and backgrounds, the
CARD LAYER DIES 1 for cut my layers for my background, the RECTANGLE DIES 2
for the rectangle layer, the HAPPY EASTER GNOMIE with the 
Hope you like my video, samples and card for today

 Supplies I Used for my Card:

Thank you for stopping by and have a GREAT Weekend!!!


Wednesday, April 19, 2023

Thanks!

 Hey Everyone! 

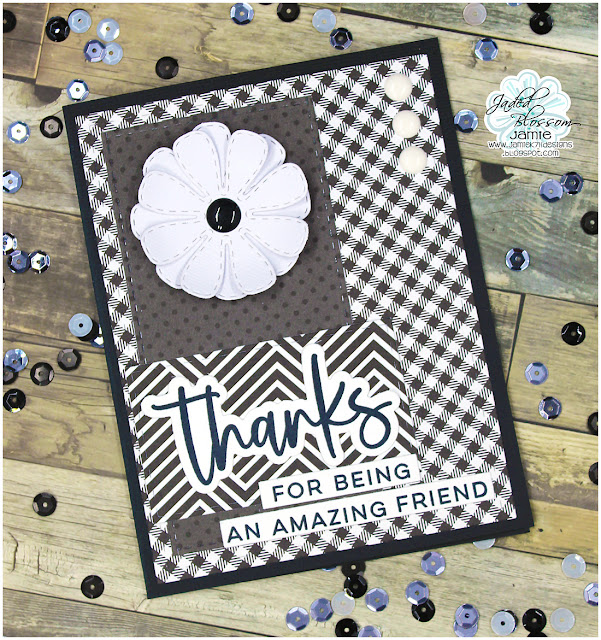
Jamie here to share a Thank You card with you!

I started with the Card Mat Die and layered the insert die from Candy Bar Slider Die that I shortened. Then I added a Rectangle Die 2. I stamped the sentiments from Thanks to the Thanks Outline Dies and the Sentiment Strip Dies. Last I added a Flower Die and a few white sprinkles! 

Recipe-

Jaded Blossom- Card Mat Dies, , Rectangle Dies 2Sentiment Strip Dies, Candy Bar Slider Die, Thanks, Thanks Outline Dies, Flower Dies


Thanks for stopping! 

Monday, April 17, 2023

Tulips for Sale

Hi friends! It's Julee here today with a bit of Spring inspiration for you. We're in like 7th winter here, with snowfall as recently as last week, so I'm really hoping spring actually comes this year! At least it has sprung in my craft room, if not outside.


For this card, I used the beautiful multi-step stamping Tulips set. I picked a couple of pinks and a couple of greens and got to work stamping up a garden. I then cut each piece with the coordinating Tulips Outline Dies.


Next up I pulled out the tulip dies from the Gnome Dies: Easter Add Ons 2. I just love these dies. I cut from pink cardstock, then lightly sponged around the edges before adhering together. For the "planter box" I used the rectangle from the Build a Booth Dies, cut from green cardstock,  I then embossed The Tulips for Sale sentiment from the Carrots for Sale set.  For the background, I used the Card Mat Dies on pink cardstock, then stenciled the Polka Dot Stencil tone on tone.  I liked the look, so decided to do the same with the tulips for sale panel, then glued everything together.

Thanks so much for stopping by today! I hope you have a fabulously creative day! 

Cupcake Money Holder Birthday Card


Happy Monday my crafty friends!!
April is full of birthdays in our family and I have another birthday card
to share with you today!! This one I made for one of my son in laws.


Here is the card I created to hold some birthday cash -


Here is the card with the money inside -


I used the following Jaded Blossom products on my card -


I love how easy it is to put a card together using all of the products listed above!!

Thanks so much for stopping by today!!


Thursday, April 13, 2023

April 2023 Stamp Release Blog Hop!


We released a ton of fun new items this week! Here is a recap


Regular Price for the Release Package is $120.99

FREEBIE OFFER: MOROCCAN STENCIL
1) Free with orders $50 or more (before tax/shipping)
2) Order MUST contain at least 1 new release item
3) Freebie offer is Thursday and Friday Only, while supplies last


BLOG CANDY

1 Lucky Winner will get to pick a stamp set of their choice!
Just leave a comment on all the blogs along the hop!
The more blogs you comment on the more chances you have to win!

Now on to the HOP....

Next up is Julee

Just in case you get lost here is the Entire Line Up:

Wednesday, April 12, 2023

April 2023 Stamp Release Day 3: Let's Fiesta!

Happy Wednesday! Today is Day 3 of our April 2023 Stamp Release!

  We have our Gotta Have it Now Package for $109.99

March 2023 Release will include:

2 - 4 x 6 Stamp Sets
2 - New Dies
2 - New Outline Dies
1: 3 x 4 Stamp Set
1- Stencil
1 - Stencil Freebie
Ala Carte Items available on Thursday 12am EST 

NO PREORDERS! NO BACKORDERS!
No waiting WEEKS for your stamps. 
*Freebie Stamp- Free While Supplies Last.*

Regular price for the release package is $120.99

-------------------------------------------------------------------------------------------
Today we are revealing 1 New Stamp and Outline Die and Freebie Item


Moroccan Stencil

Here is some inspiration from our design team members! 


Thanks so much for checking out all the projects today! Make sure to come back tomorrow for more.